How to Connect LED Light Strips to a Controller and Power Supply
About This Project
This project outlines the steps for connecting LED light strips to a controller and power supply for a DIY lighting setup.
Tools & Materials
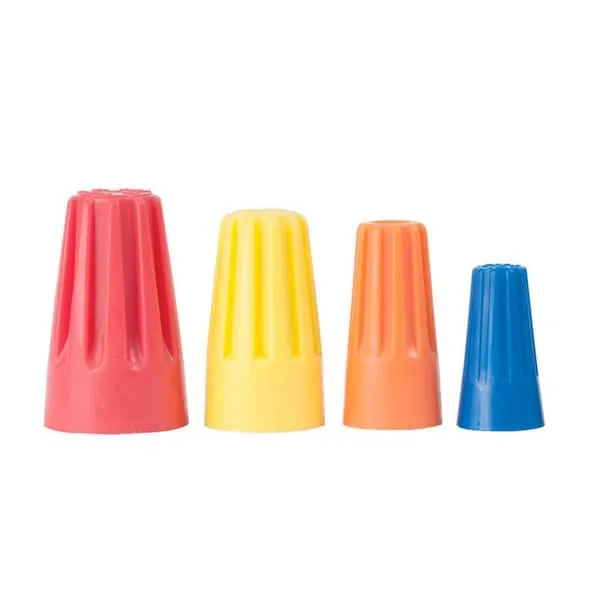
Wire Connectors

Weller 30-Watt Red Soldering Iron WL30

Wire Cutter or Stripper

CityPost 32 ft. Deck Cable Railing, 42 in. Face Mount, Black CP-32-B-D-F-42

Armacost Lighting RibbonFlex Pro 24-Volt RGB+W COB 32.8 ft. Hardwired Dimmable Cuttable Color-Changing Integrated LED Strip Light Tape 177730

The Harris Products Group 3 oz. Lead-Free Rosin Core Solder 327793
Wire Connectors
Connects electrical wires securely.
Weller 30-Watt Red Soldering Iron WL30
The Weller Nickel Plated Copper 30-Watt corded soldering iron is ideal for hobby and electronic work. The Nichrome wire heating element ensures thermal stability and long life. The heat and impact resistant
Wire Cutter or Stripper
Cuts or strips wire insulation.
CityPost 32 ft. Deck Cable Railing, 42 in. Face Mount, Black CP-32-B-D-F-42
CityPost 42 in. tall cable railing kits can be ordered to fit your needs regardless of your project layout. All kits come with enough posts to install at a maximum center-to-center spacing of 6 ft. (example:
Armacost Lighting RibbonFlex Pro 24-Volt RGB+W COB 32.8 ft. Hardwired Dimmable Cuttable Color-Changing Integrated LED Strip Light Tape 177730
24-Volt RibbonFlex Pro multi-color RGBW LED COB Tape Light from Arm cost Lighting is a perfect choice for colorful accent lighting with a seamless glow. Excellent for reflective surfaces like counter tops and floors, dotless COB LED strip lights feature Chip-on-Board technology that create a continuous strip of light that is free of dots or spots. The multi-color plus White COB lights produce a variety of rich colors and a pure 3000K soft white. 24-Volt LED Driver and a RGB+W multi-color LED Controller for dimming and color control required and sold separately.
The Harris Products Group 3 oz. Lead-Free Rosin Core Solder 327793
Silver bearing lead-free rosin core solder is designed for electrical applications. The rosin-core base eliminates the need for flux. It has a melting temperature of 430°F. It is perfect for use on speaker
Steps
Connect LED Strips to Controller
15 minutesLocate the input ports on the LED controller, typically labeled for 'R', 'G', 'B', and 'W' (or similar, depending on the controller type, e.g., single color, RGB, RGBW). Identify the corresponding connectors on the LED light strips. For RGBW strips, there will be separate connections for red, green, blue, and white LEDs. For single or dual-color strips, connect the appropriate wires to the designated ports. Pay close attention to the polarity markings (+ and -) on both the controller and the strip connectors to ensure they are matched correctly. If using solderless connectors, slide the strip into the connector, ensuring the copper contacts align with the pins. If soldering, carefully solder the wires to the designated pads on the strip, again observing polarity.
Watch: Connect LED Light Strips to Controller
Connect Controller to Power Supply
10 minutesIdentify the power input connector on the LED controller. This is usually a barrel jack or a pair of screw terminals labeled 'DC IN', '+/-', or similar. Locate the output connector from your power supply. This might be a barrel plug or bare wires. Connect the power supply's output to the controller's input. If using a barrel plug, ensure it matches the controller's jack size and that the center pin is positive (+) and the outer sleeve is negative (-), or vice-versa, as specified by the controller. If using screw terminals or bare wires, connect the positive (+) wire from the power supply to the positive (+) terminal on the controller and the negative (-) wire to the negative (-) terminal. Double-check the voltage rating of both the power supply and the controller to ensure they are compatible (e.g., both 12V or both 24V).
Watch: Connect LED Controller to Power Supply
Test the Lighting System
5 minutesEnsure all connections are secure and correctly wired. Plug the power supply into a wall outlet or connect it to its own power source. Observe the LED light strips. They should turn on, possibly to a default color or setting. Use the remote control, mobile app, or physical buttons on the controller (depending on the type) to cycle through colors, brightness levels, and any pre-programmed effects. Verify that all colors (red, green, blue, white) are functioning correctly and that the transitions between them are smooth. If using multiple strips, ensure they are all responding in sync with the controller.
Watch: Power Up and Test
Mount LED Strips and Controller
20 minutesFor LED light strips with an adhesive backing, ensure the mounting surface is clean, dry, and smooth. Remove the protective film from the adhesive and carefully press the strip into place, applying firm pressure along its entire length. If the adhesive is not sufficient, consider using mounting clips or double-sided tape designed for heavier-duty applications. For the controller, mount it in a convenient and accessible location, preferably near the power source and where the LED strips can be easily routed. Use screws, double-sided tape, or zip ties to secure the controller, ensuring it is stable and protected from damage.
Watch: Mount the LED Strips