Jewelry Cleaning
About This Project
This project outlines a high-level approach to cleaning various types of jewelry at home to restore its shine and remove tarnish or dirt.
Tools & Materials

Noritake Colortex Stone Navy 3.75 in., 9 fl.oz. Porcelain Mini Bowls, (Set of 4) G015-776D
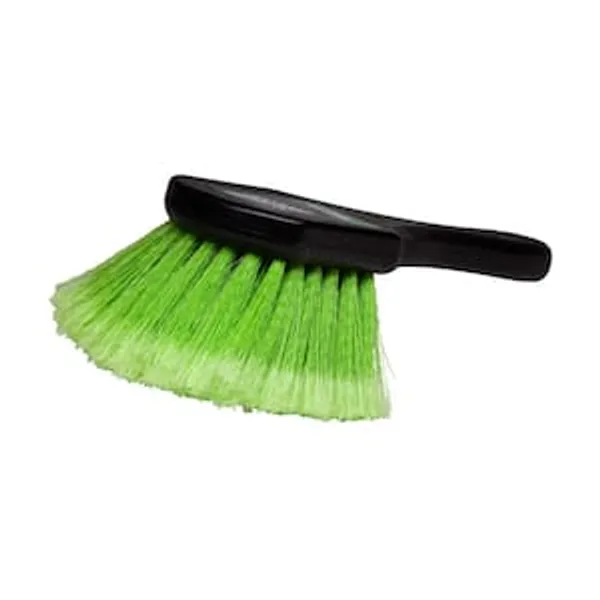
Soft Scrub Brush

Hagerty Horsehair Silver Brush 10500

Excel Steel 8.5 in. Stainless Steel Strainer Basket 330
Drop Cloth

E-Cloth 20 in. x 16 in. Microfiber Stainless Steel Cleaning Kit 2 Cloth Set 10617M
Noritake Colortex Stone Navy 3.75 in., 9 fl.oz. Porcelain Mini Bowls, (Set of 4) G015-776D
The Colortex Collection is a distinctly modern grouping of dinnerware. It is available in 9 exterior colors (Aqua, Blush, Black, Grey, Ivory, Navy, Sage, Taupe, White), showcasing a glossy pebble texture
Soft Scrub Brush
Gentle cleaning with soft bristles.
Hagerty Horsehair Silver Brush 10500
Polishing silver is easy to do when you use the proper tools. For quickly removing polish and excess oxidation from intricate pattern of fine silver. Saves hours of tedious work and is absolutely safe
Excel Steel 8.5 in. Stainless Steel Strainer Basket 330
Cooking in the kitchen requires essential tools to tackle the daily tasks and demands of the day. Need to sift and sieve dry ingredients for a delicious baked cake. Find yourself making meals that require
Drop Cloth
Protects surfaces from unwanted spills.
E-Cloth 20 in. x 16 in. Microfiber Stainless Steel Cleaning Kit 2 Cloth Set 10617M
All you need to keep stainless steel looking as good as its name, this E-Cloth kit includes 1 Stainless Steel Cloth and 1 Glass and Polishing Cloth. Masses of premium microfibers harness water's cleaning
Steps

Soak Delicate Jewelry
5 minutesCarefully place jewelry items like those with pearls, opals, or porous stones into the prepared cleaning solution. Let them soak for no more than 5-10 minutes to loosen dirt and tarnish without causing damage to the stones or metal.
Watch: Soak Jewelry in Soapy Solution
Clean Metal Jewelry with a Soft Brush
5 minutesUsing a soft-bristled toothbrush or a specialized jewelry brush, gently scrub the metal parts of the jewelry. Pay attention to crevices and settings where dirt can accumulate. Rinse the brush periodically in the cleaning solution or under running water.
Watch: Gentle Brushing to Remove GrimeDry Jewelry
4 minutesGently pat each piece of jewelry dry with a soft, lint-free cloth, such as a microfiber cloth or a clean cotton towel. Pay special attention to crevices and stone settings to ensure no moisture remains, which could lead to water spots or damage over time.
Watch: Dry Jewelry
Polish Gold and Silver Jewelry
5 minutesFor gold and silver jewelry, use a dedicated jewelry polishing cloth. Gently rub the metal surfaces with the cloth to remove any remaining tarnish and enhance its luster. Use a separate cloth for gold and silver to avoid cross-contamination.
Watch: Drying and Polishing
Address Specific Gemstone Care
10 minutesResearch the specific cleaning requirements for any precious or semi-precious gemstones in your jewelry. Some stones, like emeralds or pearls, require very gentle handling and may only need a soft brush and mild solution, while others might tolerate more rigorous cleaning. Avoid ultrasonic cleaners for most gemstones.
Watch: Clean and Dry Tigereye JewelryCommon Problems
Jewelry appears dull, cloudy, or has streaks after cleaning and drying, not sparkling as expected.
Solution: This is often caused by residue from the cleaning solution or mineral deposits from water. Rinse the jewelry thoroughly again under clean, lukewarm running water. Ensure all nooks and crannies are rinsed. Immediately dry completely with a clean, lint-free microfiber cloth (like the E-Cloth Microfiber Glass & Polishing Cloths) and buff gently.
Prevention: Ensure your rinsing process is thorough. Use distilled water for the final rinse if your tap water is very hard. Dry each piece immediately and completely after rinsing with a fresh, clean, and lint-free cloth.
Delicate gemstones (like pearls, opals, emeralds, or turquoise) become loose, cracked, or lose their luster after cleaning.
Solution: If a gemstone becomes loose, gently retrieve it and take the piece to a professional jeweler for re-setting. If a stone is cracked or damaged, professional assessment is needed. There's no DIY fix for a damaged stone.
Prevention: Always identify your gemstones before cleaning. Porous, soft, or treated stones should NEVER be soaked in water or harsh cleaning solutions. Instead, gently wipe them with a barely damp, soft cloth and dry immediately. Avoid using brushes on very soft stones. Skip the soaking step entirely for these delicate gems.
Small jewelry items, like earring backs or delicate charms, fall down the drain during rinsing.
Solution: Immediately turn off the water. Check the sink's strainer (like the Excel Steel 8.5 in. Stainless Steel Strainer Basket) or stopper. If it went past the strainer, you may need to open the P-trap under the sink. Place a bucket underneath to catch water and any fallen items before unscrewing the trap. If you're uncomfortable, call a plumber.
Prevention: Always place a stopper in the sink or use a fine-mesh strainer basket over the drain when rinsing jewelry. Better yet, rinse jewelry over a large bowl (like the Noritake Porcelain Mini Bowls) or a soft towel (Home Decorators Collection Egyptian Cotton White Bath Towel) placed on your work surface, completely away from an open drain.
Your skin becomes irritated, itchy, or red after handling the cleaning solution.
Solution: Immediately stop contact with the cleaning solution. Wash the affected skin area thoroughly with plenty of soap and water for several minutes. If irritation persists, or if you experience pain or blistering, seek medical attention.
Prevention: Always wear protective gloves (like standard household dishwashing gloves) when preparing or handling cleaning solutions. Avoid touching your face or eyes when wearing gloves that have been exposed to cleaning agents. Work in a well-ventilated area to avoid inhaling fumes.
Tarnish on silver jewelry is not completely removed, or new tarnish appears quickly after cleaning.
Solution: If tarnish remains, reapply a dedicated silver polish (like using the Hagerty Silversmiths Cloth) and buff thoroughly. Ensure you use enough pressure and polish every surface. If new tarnish appears quickly, it's likely due to incomplete drying or improper storage. Re-dry the jewelry completely with a clean, lint-free cloth, then store it in an anti-tarnish bag or cloth.
Prevention: For heavily tarnished silver, use a specific silver cleaning product and dedicated silver polishing cloth. Ensure all pieces are absolutely dry before storing them. Store silver jewelry in tarnish-preventative bags or chests to minimize air exposure and prevent re-tarnishing.
Accidentally scratching or damaging the surface of your jewelry while scrubbing.
Solution: Minor scratches on metal might be buffed out with a very fine jeweler's cloth, but deeper scratches require professional repair. There's no DIY fix for a scratched gemstone.
Prevention: Always use the softest brush appropriate for the job (like the Hagerty Horsehair Silver Brush for silver or a very soft toothbrush for general metal). Avoid abrasive cleaners or rough cloths on any jewelry. For delicate pieces, simply soak and gently wipe with a soft cloth. Never scrub aggressively.
Spilling cleaning solution on your countertop or furniture, potentially causing damage.
Solution: Immediately wipe up the spill with a clean, damp cloth. For absorbent surfaces like wood, blot the spill, then clean with a gentle cleaner appropriate for that surface. If a stain or damage remains, you may need to consult a professional for surface repair.
Prevention: Always protect your work surface by laying down a drop cloth or old towels (like the Home Decorators Collection Egyptian Cotton White Bath Towel) before you begin the cleaning process. This creates a barrier against spills and catches any small pieces that might drop.
Frequently Asked Questions
What kind of cleaning solution is safe for most types of jewelry?
A gentle cleaning solution can be made with warm water and a few drops of mild dish soap. Avoid harsh chemicals like bleach or ammonia, as they can damage certain gemstones or metals over time. For silver, specialized silver cleaning solutions or dips are also effective.
Are there any types of jewelry I should *not* clean at home using these methods?
Yes, avoid using these methods for very delicate, antique, or organic materials like pearls, opals, emeralds, coral, or pieces with glued-in stones. These require specialized care, and harsh solutions or brushes can cause irreversible damage. Consult a professional jeweler for these items.
How long does a typical home jewelry cleaning session take, and is it suitable for beginners?
This project is beginner-friendly and generally takes about 3 hours from start to finish, including soaking and polishing times. The actual hands-on cleaning time is much shorter, making it manageable for anyone new to DIY jewelry care.
What's a common mistake people make when cleaning jewelry at home, and how can I avoid it?
A common mistake is using abrasive materials or stiff brushes, which can scratch softer metals or gemstones. Always use a soft-bristle brush, such as a horsehair brush or a soft toothbrush, and microfiber cloths for drying and polishing to protect your jewelry.
What's the approximate cost for the essential tools and supplies needed for this project?
The initial cost for essential tools like mini bowls, a soft brush, a small strainer, microfiber cloths, and a polishing cloth can range from $30-$70. Many items, like mild dish soap and a bath towel, you might already have at home, reducing the overall expense.
After cleaning, my silver jewelry still looks dull or has dark spots. What could be the issue?
If silver still looks dull, it's likely due to persistent tarnish that a simple soak didn't fully remove. Use a specialized silver polishing cloth, like the Hagerty Silversmiths Cloth, and gentle, consistent rubbing to restore its shine. Ensure the cloth is clean and dedicated only to silver.
Can I use the same cleaning method for gold jewelry with different gemstones?
While the general method works for many robust gemstones, some, like emeralds, opals, and pearls, are more porous or delicate. For these, use only a damp, soft cloth to gently wipe the stone and dry immediately. Always research specific gemstone care to avoid damage.